In a nutshell
- 🧩 The quick trick combines self-adhesive mesh patches, ready-mixed lightweight filler, and damp-sponge feathering for clean, sturdy wall repairs with minimal sanding.
- 🧰 Most tools are household staples; add a flexible filling knife, mesh patch, and primer–sealer to prevent flashing—low cost, high impact.
- 🪄 Step-by-step: clean and key the area, fill, sponge-smooth edges, then prime and paint with a mini roller for an invisible blend—often same-day paint-ready.
- ⏱️ Drying times run 20–120 minutes depending on the defect; ideal on painted plaster and plasterboard; deeper voids benefit from a two-stage fill.
- ⚠️ Avoid pitfalls: don’t overfill or skip primer; control humidity, limit sanding dust with the damp-sponge pass, and monitor recurring cracks for potential structural issues.
Across the UK, homeowners are quietly fixing scuffs, screw pops and picture-hook craters without booking a decorator. The secret isn’t exotic. It’s a tidy, time-saving quick trick built around self-adhesive mesh patches, ready-mixed lightweight filler and a damp-sponge smoothing technique that all but eliminates dusty sanding. Small repair. Fast cure. Clean finish. In a rental, it can protect your deposit. In your own place, it restores pride in a hallway or sitting room battered by daily life. Done properly, this approach delivers paint-ready walls in hours rather than days, with less mess and no specialist kit. Here’s how it works, when to use it, and the pitfalls to avoid.
What Is the Quick Trick?
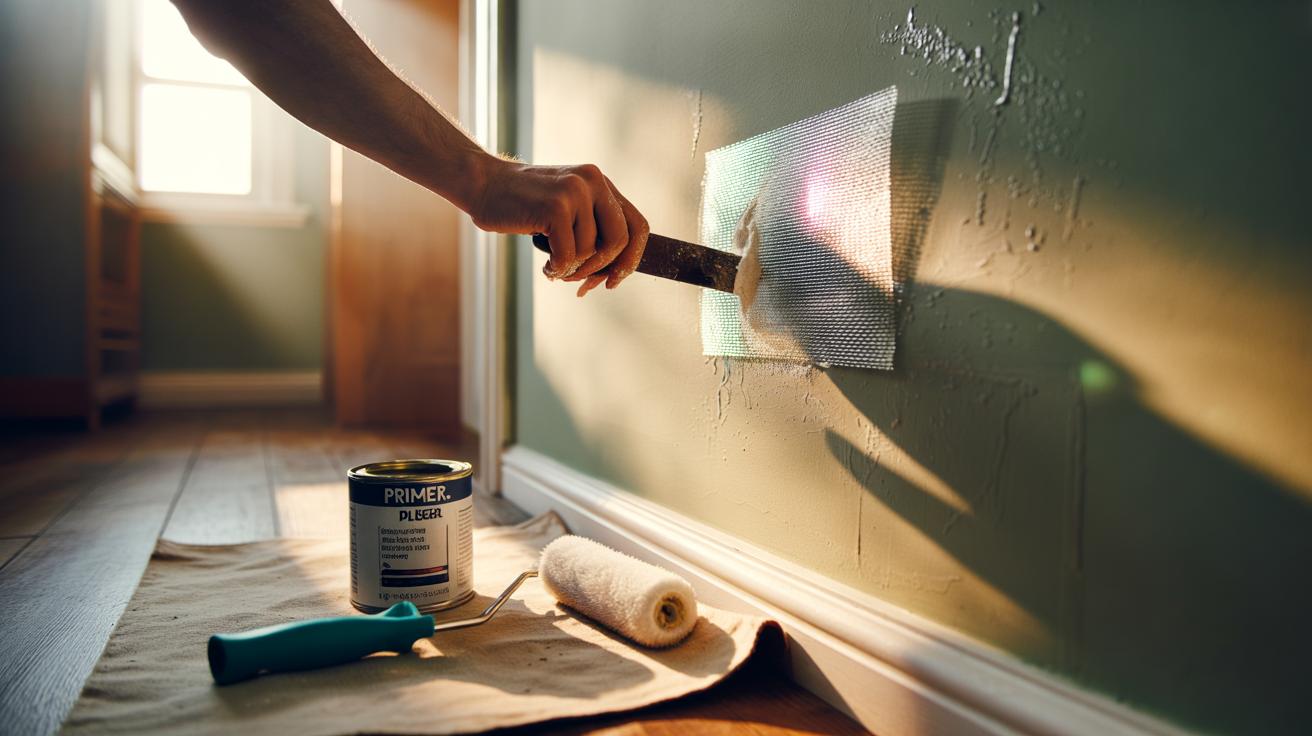
The trick is a streamlined repair method that swaps slow, dusty sanding for damp-sponge feathering, combines a self-adhesive mesh patch for stability, and relies on a ready-mixed lightweight filler to cut drying time. For hairline cracks and nail holes, you press in a dab of filler, then shape and smooth with a slightly damp sponge, wiping outward to blend the edges invisibly. For larger dents or torn plasterboard paper, a mesh patch bridges the gap, preventing the filler from sagging and stopping cracks from reopening.
In many homes, the real time-saver is the finish. The damp sponge softens and feathers the perimeter, so you need only a token hand-sand—sometimes none at all. That means fewer sheets on the floor, less dust in the air, and a quicker path to paint. You can patch, smooth and repaint a wall section in a single afternoon. It’s especially effective on emulsion-painted plaster and standard plasterboard, where the surface takes a feathered edge beautifully.
For deeper voids (10–20 mm), a two-stage fill helps: a fast-setting base compound for bulk, then a light skin of ready-mixed filler for the final face. Even here, the damp-sponge technique keeps the transition invisible, avoiding that tell-tale hump you see after hurried sanding.
Tools and Materials You Already Own
Most households already have 80% of what’s needed in a utility cupboard or toolbox. A flexible filling knife or old store card spreads material perfectly. A microfibre cloth and a clean washing-up sponge handle the wipe-back. Add a small tub of ready-mixed lightweight filler—Polyfilla is a familiar UK option—a sheet of self-adhesive mesh for bigger dings, and a quick-dry primer–sealer to stop patchy sheen, known as flashing.
If you’ve got none of that to hand, the outlay is modest. A mesh patch costs less than a coffee, and a 600 g tub of filler stretches to dozens of small repairs. Skip the internet myths: toothpaste and bar soap are temporary bodges that stain, shrink and fail under paint. For those sensitive to dust, keep a bucket of clean water nearby; refreshing your sponge as you feather the edges makes the process nearly dust-free.
| Defect | Quick Fix | Typical Drying Time | Paint-Ready |
|---|---|---|---|
| Pin holes / hairline cracks | Lightweight filler + damp-sponge feather | 20–60 minutes | Same day |
| Small dents (up to 20 mm) | Mesh patch + filler skim | 45–90 minutes | Same day |
| Torn paper / screw pops | Seal, fill, sponge feather | 60–120 minutes | Same day or next |
Keep a small detail roller and offcut of your wall colour for blending. A matte or eggshell finish hides sins far better than high sheen.
Step-by-Step: Patch, Smooth, Paint
Prep first. Clean the area with sugar soap, rinse, and let dry. Lightly score glossy paint with 120–180 grit to give the filler a key. For torn plasterboard paper, dab a primer–sealer before you fill to prevent bubbling. Good adhesion at the start prevents cracks later.
Fill next. For holes and cracks, press in ready-mixed lightweight filler with a flexible knife, then scrape off the excess flush with the wall. For larger dents, stick a self-adhesive mesh patch over the damage, spread filler across it, and extend 2–3 cm beyond the edges. Don’t overwork it; a smooth, slightly proud fill is fine.
Sponge-smooth. After 10–20 minutes (or when the surface is firm but still workable), swipe a damp—not wet—sponge in light circles from the centre outward, feathering edges into the surrounding paint. Rinse the sponge often. If you reveal a hollow, add a whisper of filler and repeat once it gels. You’re aiming for an invisible transition, not a glossy polish.
Prime and paint. Once dry, mist a thin coat of primer–sealer over the patch to stop flashing. Touch in with your wall colour using a mini roller, rolling slightly beyond the repair to blend texture. On older paint, go one size larger with your blend area for a seamless look. Always prime the patch before colour; it’s the difference between “obvious repair” and “where was it?”
Common Mistakes and How to Avoid Them
Overfilling is the classic error. It creates a tell-tale bump that even heavy paint won’t hide. Keep fills lean, and trust the damp-sponge feather to do the blending. Another trap is skipping primer on raw paper or filler; the patch will flash under light, looking shinier or duller than the rest. Prime any exposed paper or fresh filler—no exceptions.
Watch for movement. Recurrent cracks at door frames or stairwells often reflect movement in the substrate. Bridge these with fibreglass mesh tape or a flexible decorators’ caulk where appropriate, then finish with a thin filler skim. If a crack is wider than 2–3 mm, or keeps reopening, you may be chasing a structural issue.
Dust chaos is optional. People sand too soon, using coarse grit that scours the paint film. Let the filler set properly, sponge-feather, then finish with a gentle touch of 240 grit if needed. Colour mismatch is another heart-sink. Even “the same tin” can shift with age. Decant, stir thoroughly, and roll out the touch-up, feathering into a wider blend if your wall is sun-faded.
Finally, manage humidity. Bathrooms and kitchens slow drying and can bubble paper if you rush. Use gentle ventilation or a small fan. If in doubt, extend drying time rather than force it with high heat. And for long horizontal cracks, sagging plaster, or damp-stained areas, bring in a pro; those symptoms belong to the building, not just the paint.
The beauty of this quick trick is its simplicity: a mesh patch for strength, a lightweight filler for speed, and a damp sponge to finesse the boundary so sanding is minimal and mess is low. It’s cheap, teachable, and reliable across most painted plaster walls you’ll find in British homes. Prime smartly, blend patiently, and you’ll erase years of knocks in an afternoon. Ready to try it on that scuffed hallway or the spare room you’ve been avoiding—or do you have a different hack that’s worked wonders on your walls?
Did you like it?4.4/5 (24)